Pagina 3 di 9 PrimaPrima 12345 ... UltimaUltima
Risultati da 21 a 30 di 83

Discussione: Borse

  1. #21
    L'avatar di Natalia
    Natalia è offline Moderatrice
    Data Registrazione
    19-06-2009
    Località
    Cagliari
    Messaggi
    19,665
    Grazie
    10,426
    Ringraziato 18,782 volte in 7,088 Discussioni

  2. #22
    Alessandra Orazi è offline Utente + Blog
    Data Registrazione
    21-11-2011
    Località
    Marche
    Messaggi
    89
    Grazie
    90
    Ringraziato 106 volte in 43 Discussioni

    Predefinito

    Ciao Ragazze, che ne dite di questa... dal blog Bag'n-telle

    CABOCHON ROSE HANDBAG


    ‘Cabochon Rose Handbag’

    This little evening handbag resembles a corsage and is carried on the wrist. It can be made up in colours and fabrications to compliment the lady’s dress. Dimensions: approximately 6 ½” in diameter X 1½” deep [16.5 cm X 4cm ] Construction Method: Turned finish – this method may be recognized by noting the lack of machine-stitching that is visible at points of assembly on the exterior side of the bag. This is possible by placing the material, or parts, face to face, machining and turning right-side out. It is the most commonly used assembly process. Material Used: 1oo% polyester dobby-weave satin, with contrast piping. You will need:
    • 1 closed zipper, 5 ½” [14 cm] long
    • ½ yd. [0.5 m] of fashion fabric, 45” [115 cm] wide **
    • ¼ yd. [0.25 m] of lining fabric, 45” [115 cm] wide
    • ¼ yd. [0.25 m] of fusible interfacing, 45” [115 cm] wide
    • ¼ yd. [0.25 m] of nylon netting, 18” [45 cm] wide
    • 1 package of piping, ¼ ” [6 mm] wide
    • ⅓ yd. [0.30 m] of belting, 1” [25 mm] wide
    • coordinating thread
    • kraft paper

    Design Tip: Instead of contrasting piping, make up your own piping to match. PATTERN The size of your hand bag is based on the span of your hand. The opening should allow for your hand to enter and remove contents from the bag interior. A zipper length of 5” to 6″ (12.5 – 15 cm) is required. Draw 2 circles onto kraft paper with a radius equal to half the zipper length plus 1” (25 mm).
    To create depth to the bag silhouette, draw a narrow dart on one of the circles, from the center of the circle. Make the dart opening about 1 ½ inches [38 mm]. This is the bag front pattern. On the second circle, reduce the diameter so that the circumference is equal to that of the first circle. Do this by drawing parallel to the inside of the circle ⅛” (3mm) for every ½ – inch of circumference reduction. (In this case, ¼ ” [6 mm] is used to reduce the diameter to 6″ [15 cm].) Cut the circle in half. This is the bag back pattern. (To verify the size, the circumference of each circle should be equal.)
    Next, draw an oblong for the strap handle. It is double the width of the belting and 2” [50 mm] longer in length. This is the bag strap pattern piece. Add seam allowance to all pattern pieces. CUTTING Bag Front – cut 1X self; cut 1X fusible; cut 1X netting; cut 1X lining Bag Back – cut 2X self; cut 2X fusible; cut 2X lining Strap – cut 1X self; cut 1X belting Petals – cut strips of bias cloth about 2 – 3” wide [50-75 mm]; use as many as needed to make flower. ** Cautionary Note: The fabric used to create the petals should be a thin and lightweight one, as the layers will thicken as you make up the flower. Your sewing machine’s presser foot must be able to sew through the thickness of the layers. ASSEMBLY a) Fabric Preparation: Iron fusible interfacing onto wrong side of fabric on front and back pieces following manufacturer’s directions.
    b) Bag Handle Preparation: With FACE SIDES together, align and match long edges of the fabric strip and pin/baste together. Sew up seam and press open. Turn the “tube” right-side-out and press flat. Place a length of belting between the layers of fabric through the tunnel. Top stitch close to the edges through all layers to create a relief effect. Set aside. c) Cabuchon Rose Preparation: For the handbag’s curved silhouette, cut a circle of netting the desired size (1), and sew dart to form a conical shape. Cover this with fashion fabric, made up in the same way (2). Cut bias strips of fabric, and fold these in half; link these as in a chain (3). Pin and sew these to the shape. Place another bias strip across these, allowing enough slack to give a natural shape, to represent a rose petal (4). Arrange more bias strips around the shape (5), alternating them to give the appearance of a rose (6). The last strips need to be cut wider to allow the piping to be placed along the circumference to neaten the edges of the bag (7). Trim any excess away around the circumference of the bag and keep layers along the piped edge thin and graded. Add piping to edge of circle. Design Tip: Use a shade darker colour for fabric for the centre of rose. d) Zipper Insertion: Align and center zipper between the two half-circles. Pin/baste zipper to straight edge of each circle. Sew zipper in place using zipper foot attachment or back-stitch by hand. Press flat and topstitch. e) Bag Assembly: Fold the strap in half and baste the open ends to the back section above the zipper opening. With FACE SIDES together, pin/baste the edges of the back section of the bag and its front section together along the piped trim. The strap handle should be located at the top of the handbag, and be certain to open the zipper so that you’ll be able to turn the bag right-side-out. Stitch around the outer edge of the piping to shape the body of the bag, ensuring to catch the strap ends in the stitching. Gently turn bag right-side-out. f) Finishing: With FACE SIDES together, pin/baste the back sections of the lining fabric and sew each end together, leaving the center of the seam open. Layer the front and back of the lining with FACE SIDES together; align and match the circumferences and pin/baste together. Sew around the circular shape. Drop lining into bag and slipstitch lining to back of the zipper tape to neaten interior of the handbag.

  3. #23
    L'avatar di Natalia
    Natalia è offline Moderatrice
    Data Registrazione
    19-06-2009
    Località
    Cagliari
    Messaggi
    19,665
    Grazie
    10,426
    Ringraziato 18,782 volte in 7,088 Discussioni

    Predefinito borse

    wowwwwwwwww che bello questo monotematico!!!
    vi posto ancora un paio di borse abbastanza facili da realizzare!
    Anteprime Allegate Anteprime Allegate Borse-b1-2-jpg   Borse-b1-jpg  

  4. Per questo Post, l'utente Natalia e' stato ringraziato da:

    Betty23 (02-02-2016)

  5. #24
    L'avatar di Natalia
    Natalia è offline Moderatrice
    Data Registrazione
    19-06-2009
    Località
    Cagliari
    Messaggi
    19,665
    Grazie
    10,426
    Ringraziato 18,782 volte in 7,088 Discussioni

  6. #25
    L'avatar di beffy
    beffy è offline Crocettina Gold
    Data Registrazione
    18-10-2011
    Località
    Sardegna ca
    Messaggi
    3,024
    Inserzioni Blog
    1
    Grazie
    522
    Ringraziato 1,177 volte in 746 Discussioni

    Lightbulb Borsa

    Borse-borsa-rosa-cucito1-jpg Borse-borsa-rosa-cucito2-jpg
    Beffy "La vita è preziosa, abbine cura".(Madre Teresa di Calcutta)

  7. I seguenti 5 utenti ringraziano beffy per questa discussione:

    Francesca0580 (09-08-2017), lora (13-11-2012), luisa65 (14-11-2012), mammaemu (13-11-2012), manulella (13-11-2012)

  8. #26
    L'avatar di beffy
    beffy è offline Crocettina Gold
    Data Registrazione
    18-10-2011
    Località
    Sardegna ca
    Messaggi
    3,024
    Inserzioni Blog
    1
    Grazie
    522
    Ringraziato 1,177 volte in 746 Discussioni

    Lightbulb Borsetta Poit ( parte 1)

    Borse-borsetta-poit-jpg Borse-borsetta-point-2-jpg Borse-borsa-point-3-jpg Borse-borsa-point-4-jpg
    Beffy "La vita è preziosa, abbine cura".(Madre Teresa di Calcutta)

  9. Per questo Post, l'utente beffy e' stato ringraziato da:

    lora (14-11-2012)

  10. #27
    L'avatar di beffy
    beffy è offline Crocettina Gold
    Data Registrazione
    18-10-2011
    Località
    Sardegna ca
    Messaggi
    3,024
    Inserzioni Blog
    1
    Grazie
    522
    Ringraziato 1,177 volte in 746 Discussioni

    Predefinito Borsetta Poit ( parte 2)

    Borse-borsetta-point-5-jpg Borse-borsetta-point-6-jpg Borse-borsetta-point-7-jpg Borse-borsetta-point-8-jpg
    Beffy "La vita è preziosa, abbine cura".(Madre Teresa di Calcutta)

  11. #28
    L'avatar di miriam p
    miriam p è offline Moderatrice
    Data Registrazione
    21-09-2011
    Località
    Sardegna (Sulcis Iglesiente)
    Messaggi
    2,516
    Inserzioni Blog
    1
    Grazie
    1,333
    Ringraziato 1,777 volte in 1,007 Discussioni

    Cool Borsa fiorita...( prima parte)

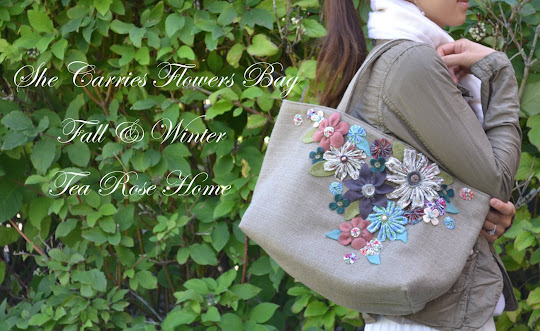
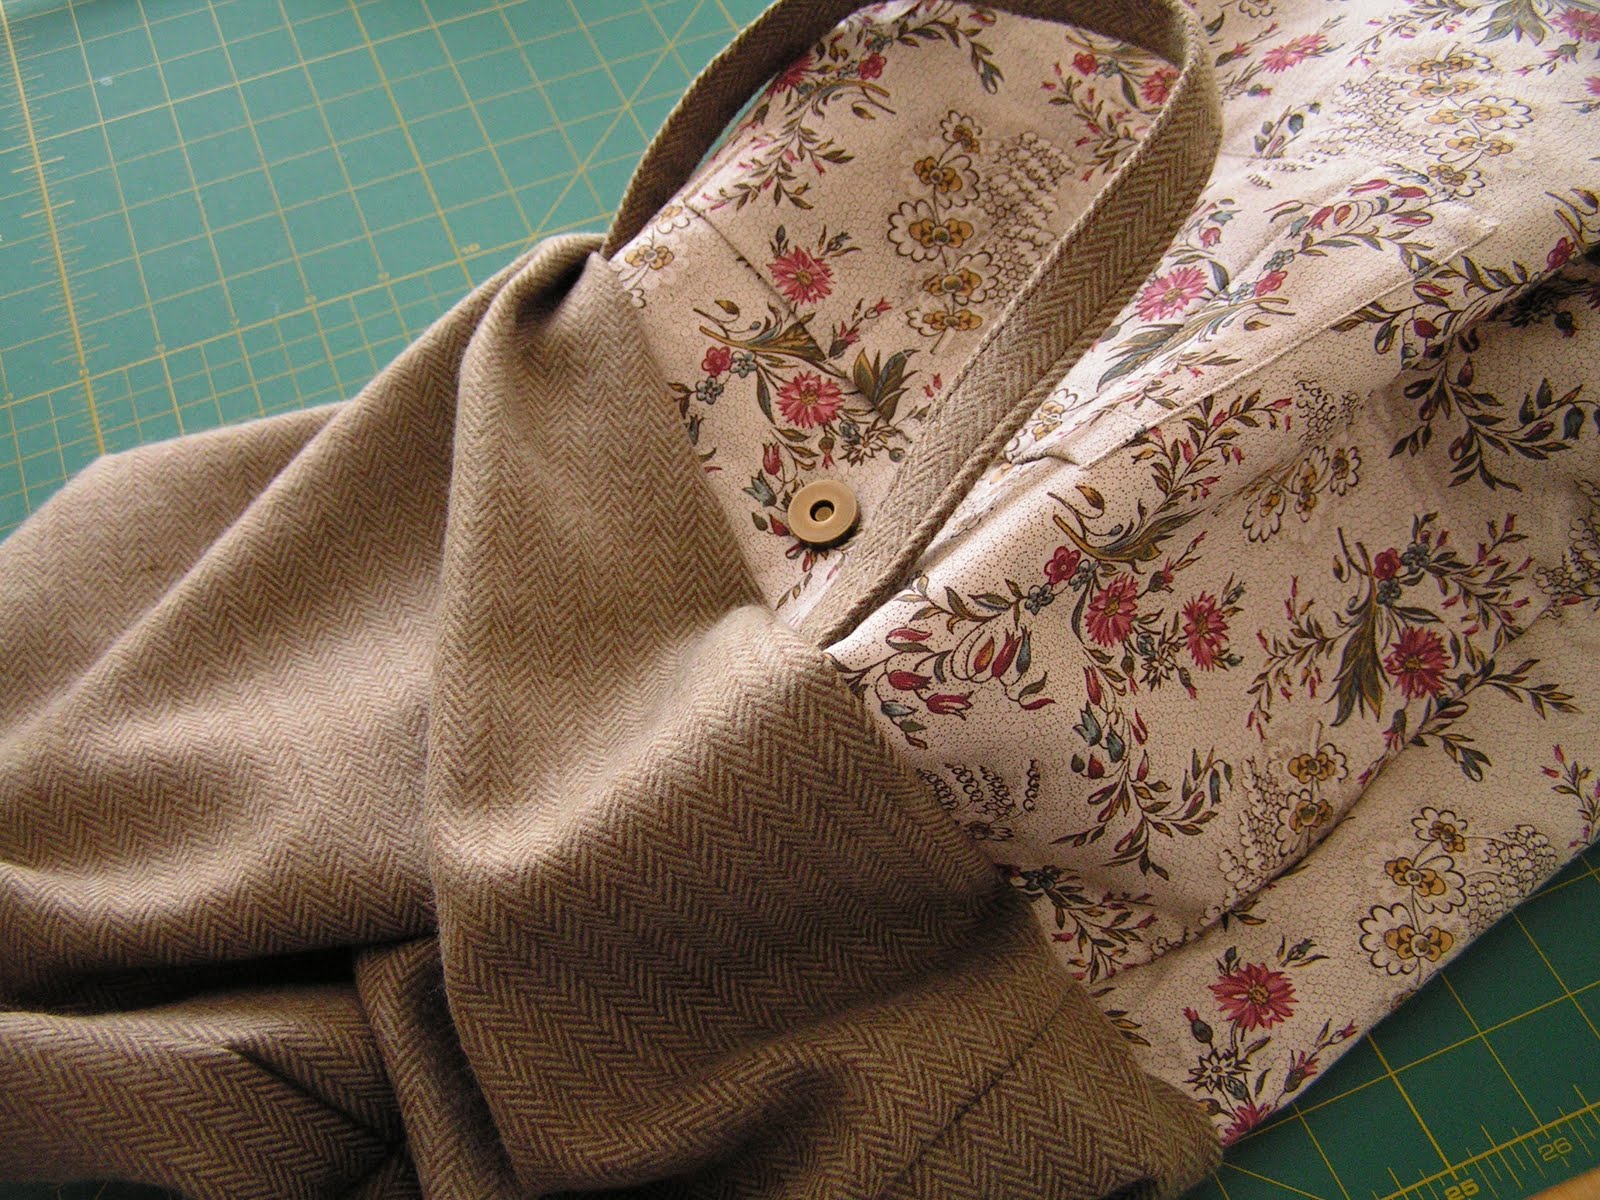
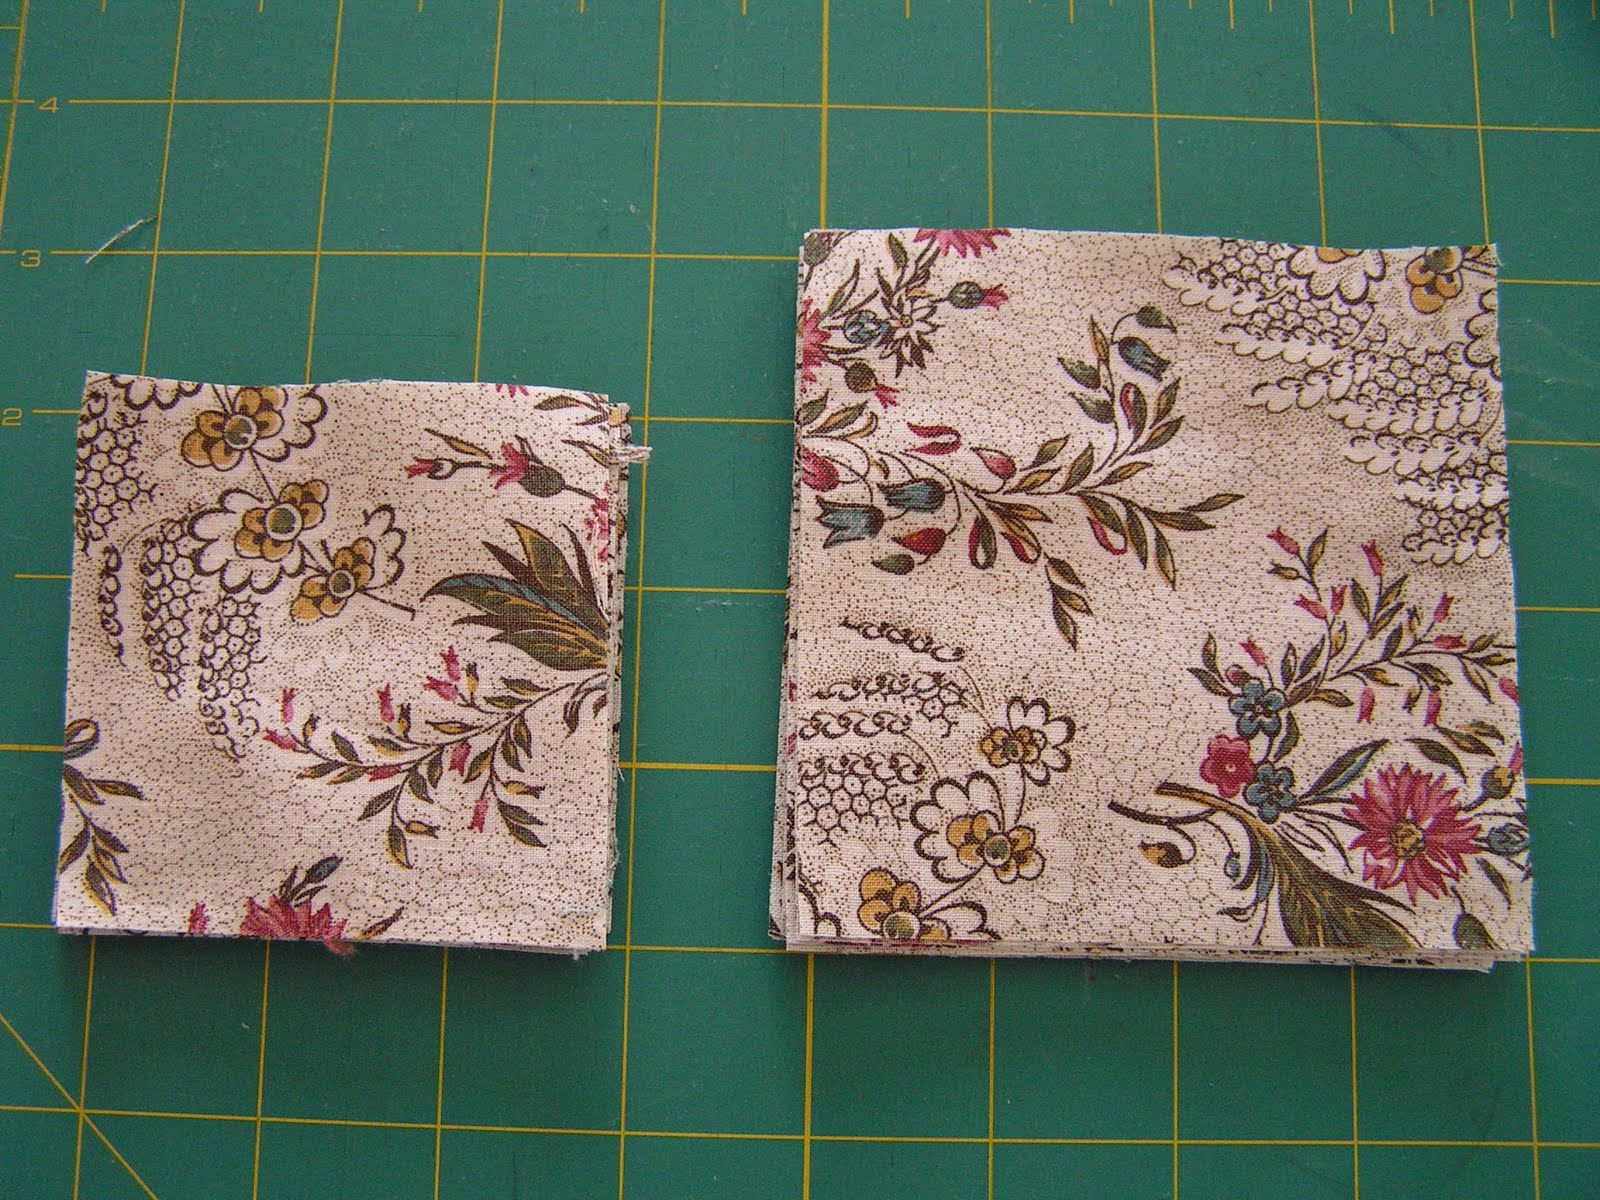
    Voglio condividere il tutorial con voi oggi. **** Avrete bisogno di Lana, o di lana come il tessuto tweed 1/2 "m 100 tessuto di cotone per il rivestimento 1yd pile fusibile abbastanza per metterli sul retro del rivestimento rinforzo adesivo (spessore 2 pezzi) di 2 1/2 "x 19 1/2"Corrispondenza filo Magnete di chiusura Per i fiori sul sacchetto ... avrete bisogno di diversi tessuti, lane e bottoni {Procedura** {Assemblaggio per la borsa** 1. Prima di tagliare .. i tessuti, fondere il fusibile in pile sul tessuto per il rivestimento In questo modo non c'è bisogno di misurare e tagliare due volte Si risparmia tempo ed è molto più facile. Dal taglio tessuto tweed .... 2 - 14 "x 20 "2 - 3" x 20 ", dal rivestimento fuso, taglio 2 - 14" x 20 ", 1 - 6" x 8 1/2 ".


    2. Fai tasca. In primo luogo trattare il bordo con zigzag e piegare l'angolo. In secondo luogo, piegare i lati e il fondo per fare un angolo squadrato. Quindi, piegare la parte superiore due volte e cucire.


    3. Segnare il centro su uno dei rivestimenti e 2 1/2 "nella parte superiore. Appuntate la tasca sul tessuto e cucire.


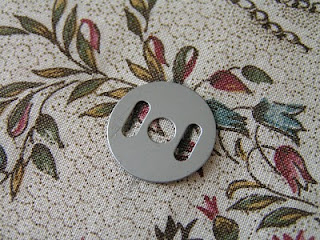
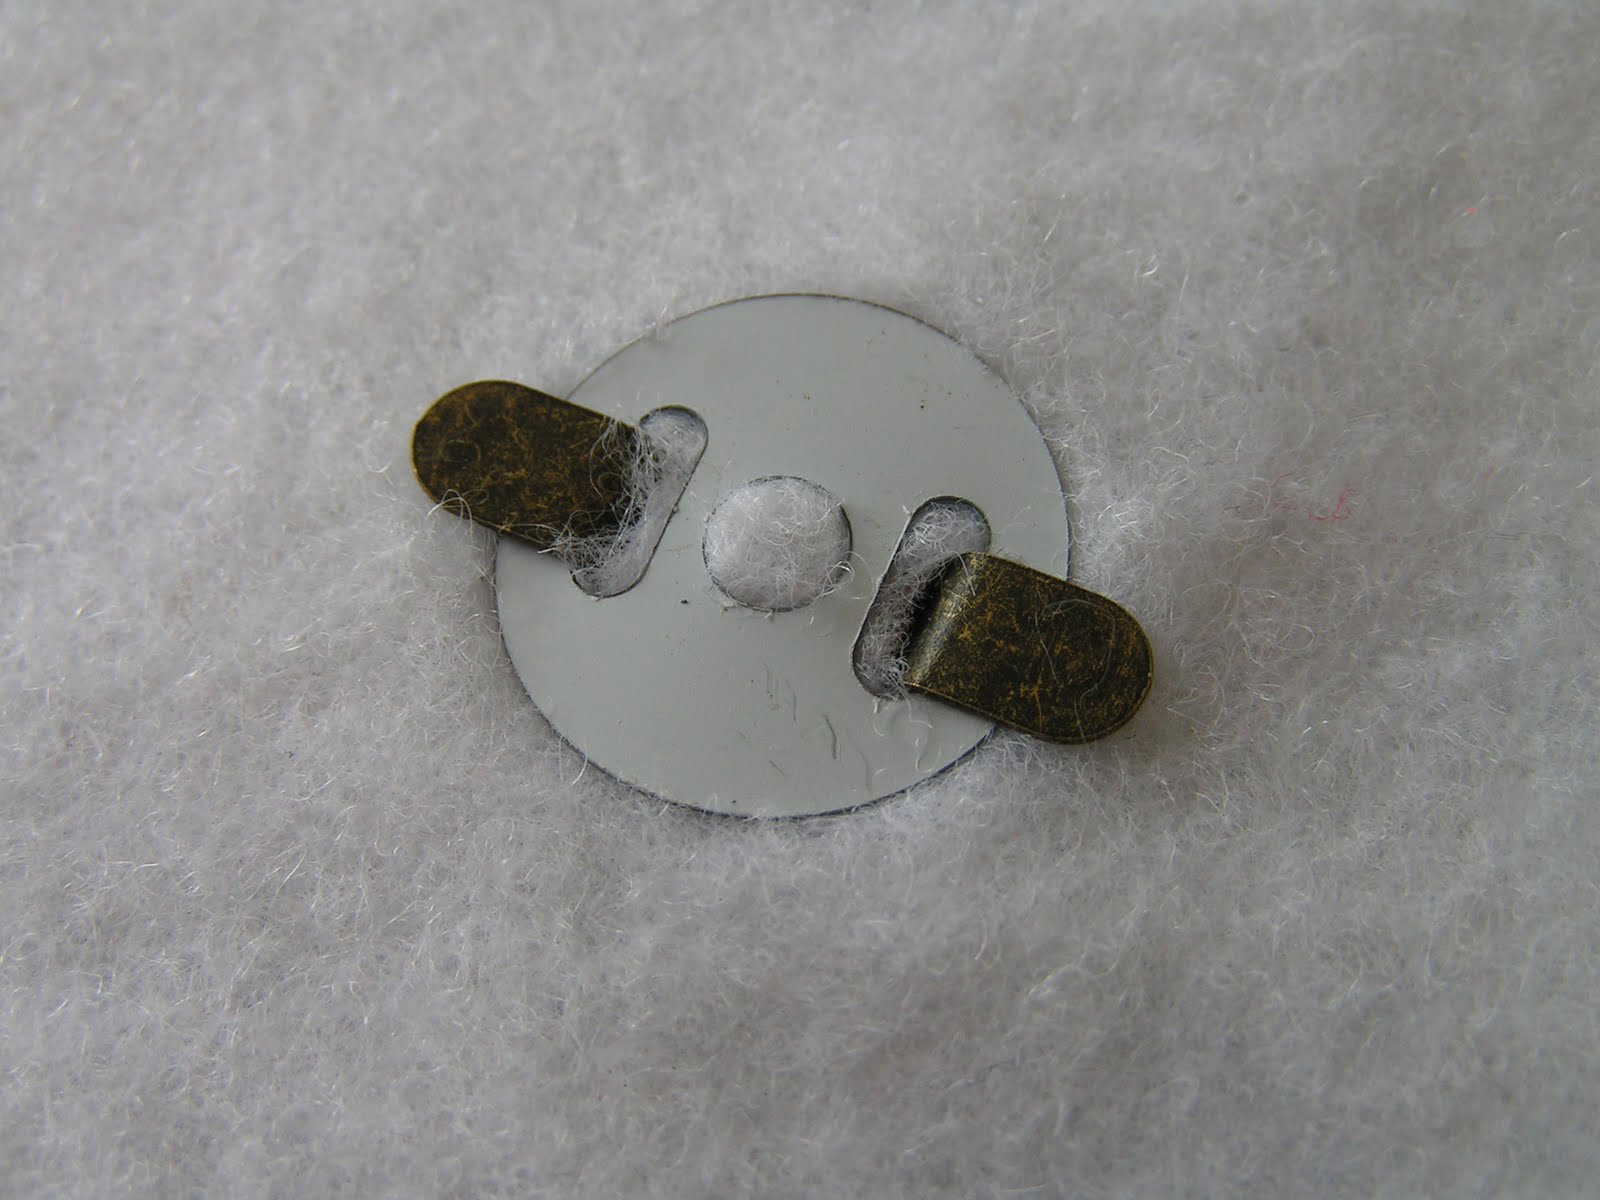
    4. Mark sul tessuto da destra, 2 1/2 ", 4", 1 1/4 ". Dividere la tasca mi piace in questo modo in modo da avere tasche separate per penne, telefono, e simili. 5 Mark. "dal top nel mezzo, e usare le parti della chiusura magnetica a segno.Tagliare la linea marcata aperto, e installare le parti magnete secondo le istruzioni sulla confezione.


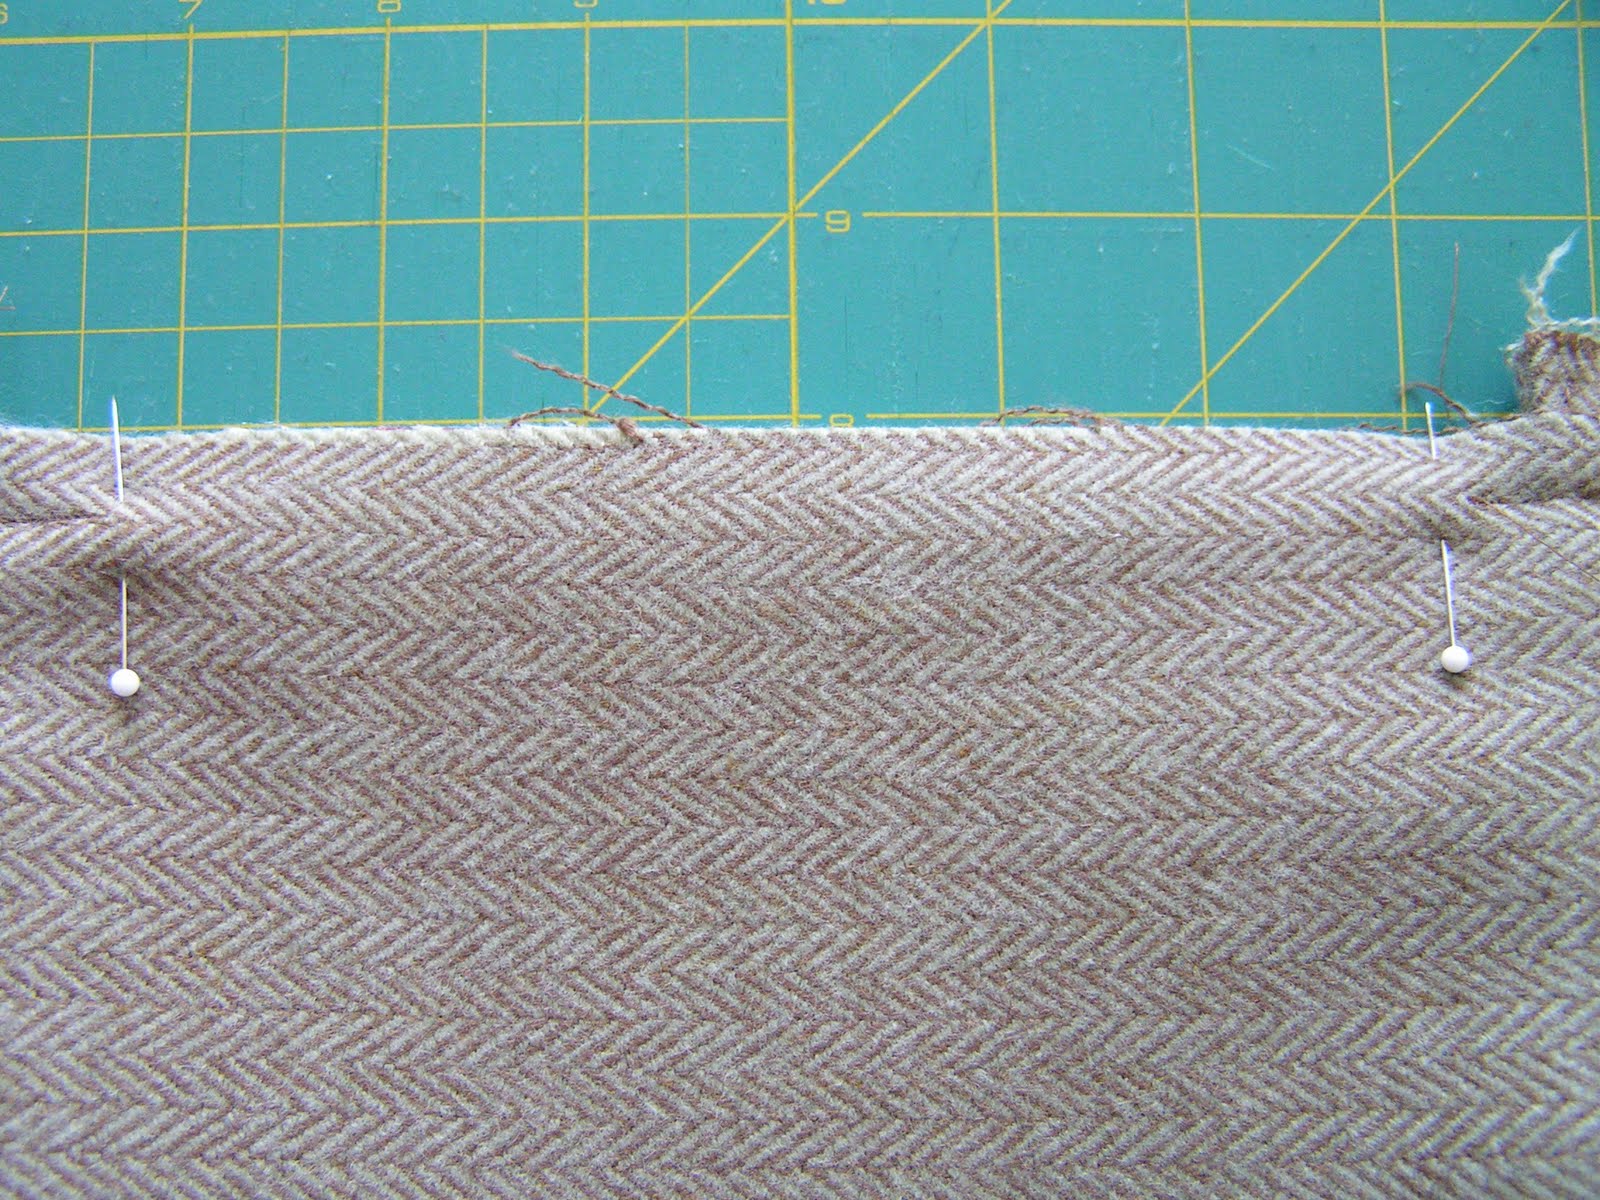
    6. Mettere in fila dritto contro dritto. Cucire i lati e il fondo con 1/2 "cucitura. 7. Per fare un fondo scatola, pizzicare l'angolo, e allineare i lati e la parte inferiore della giuntura. che Pin e tracciare una linea a 3 "segno dalla punta. Cucire sulla linea, tagliare l'eccesso.


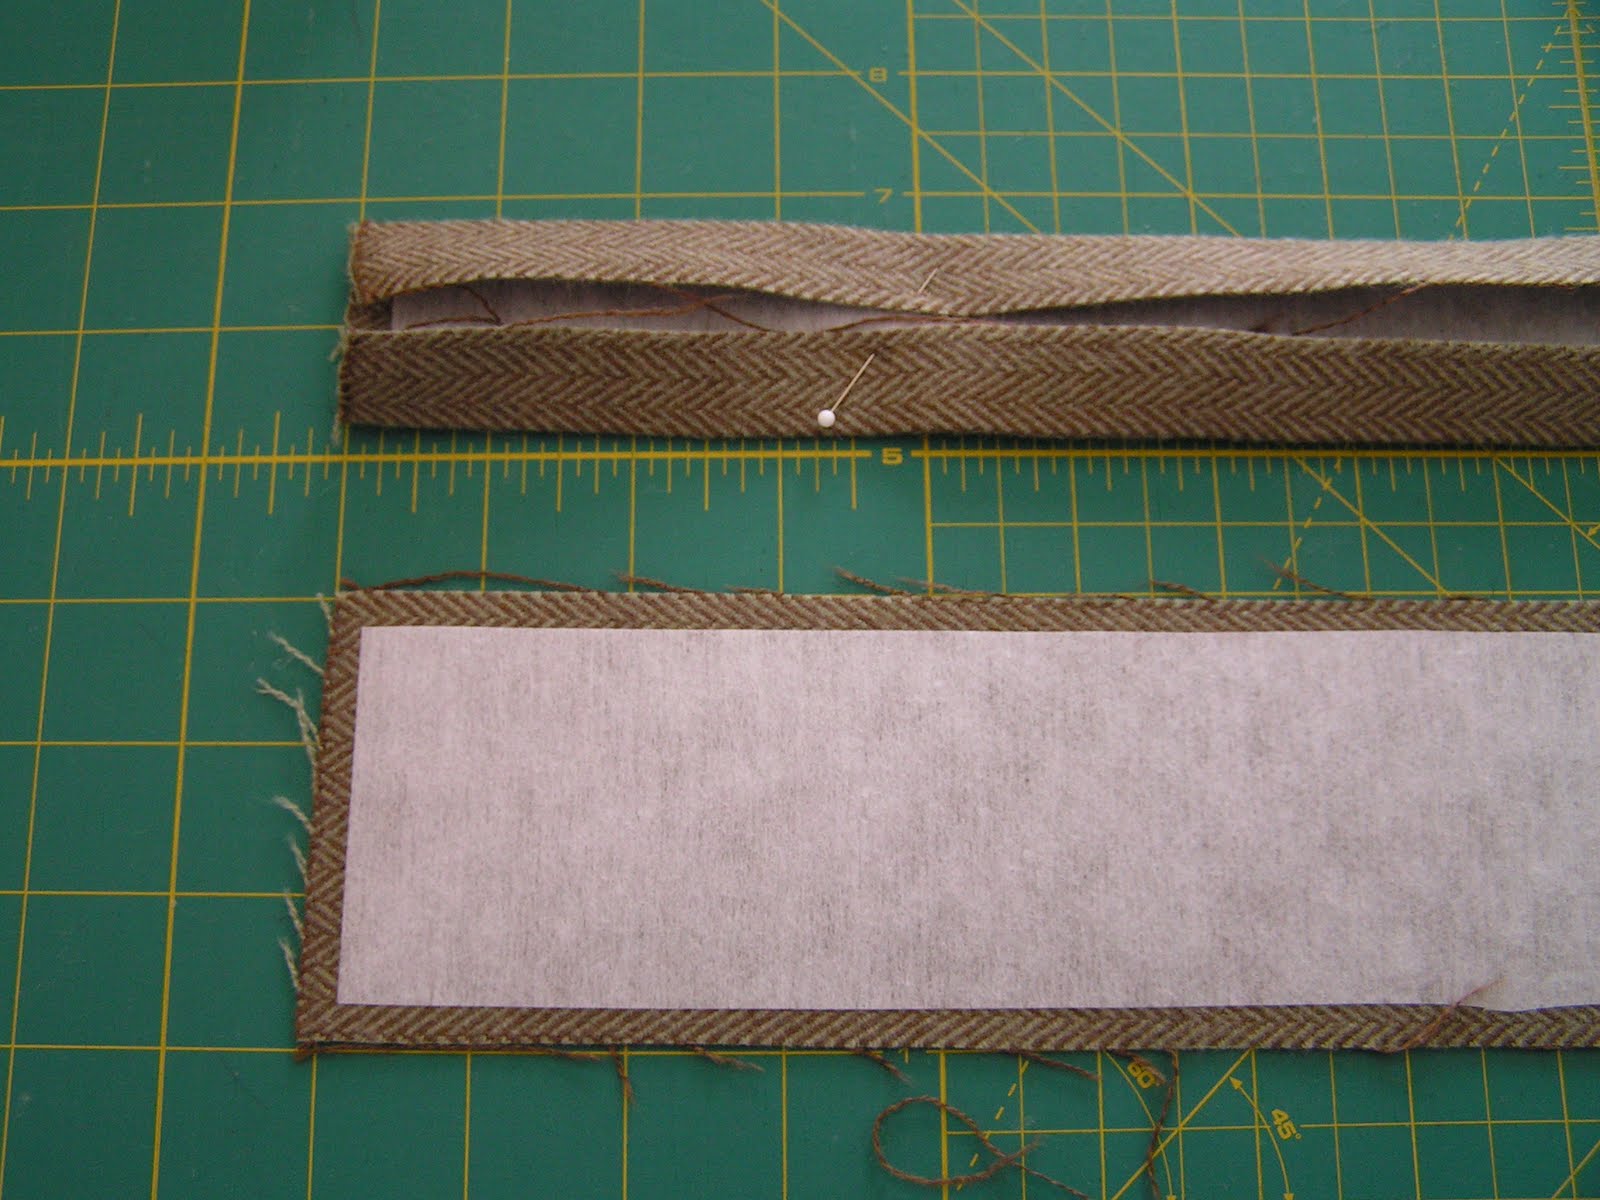
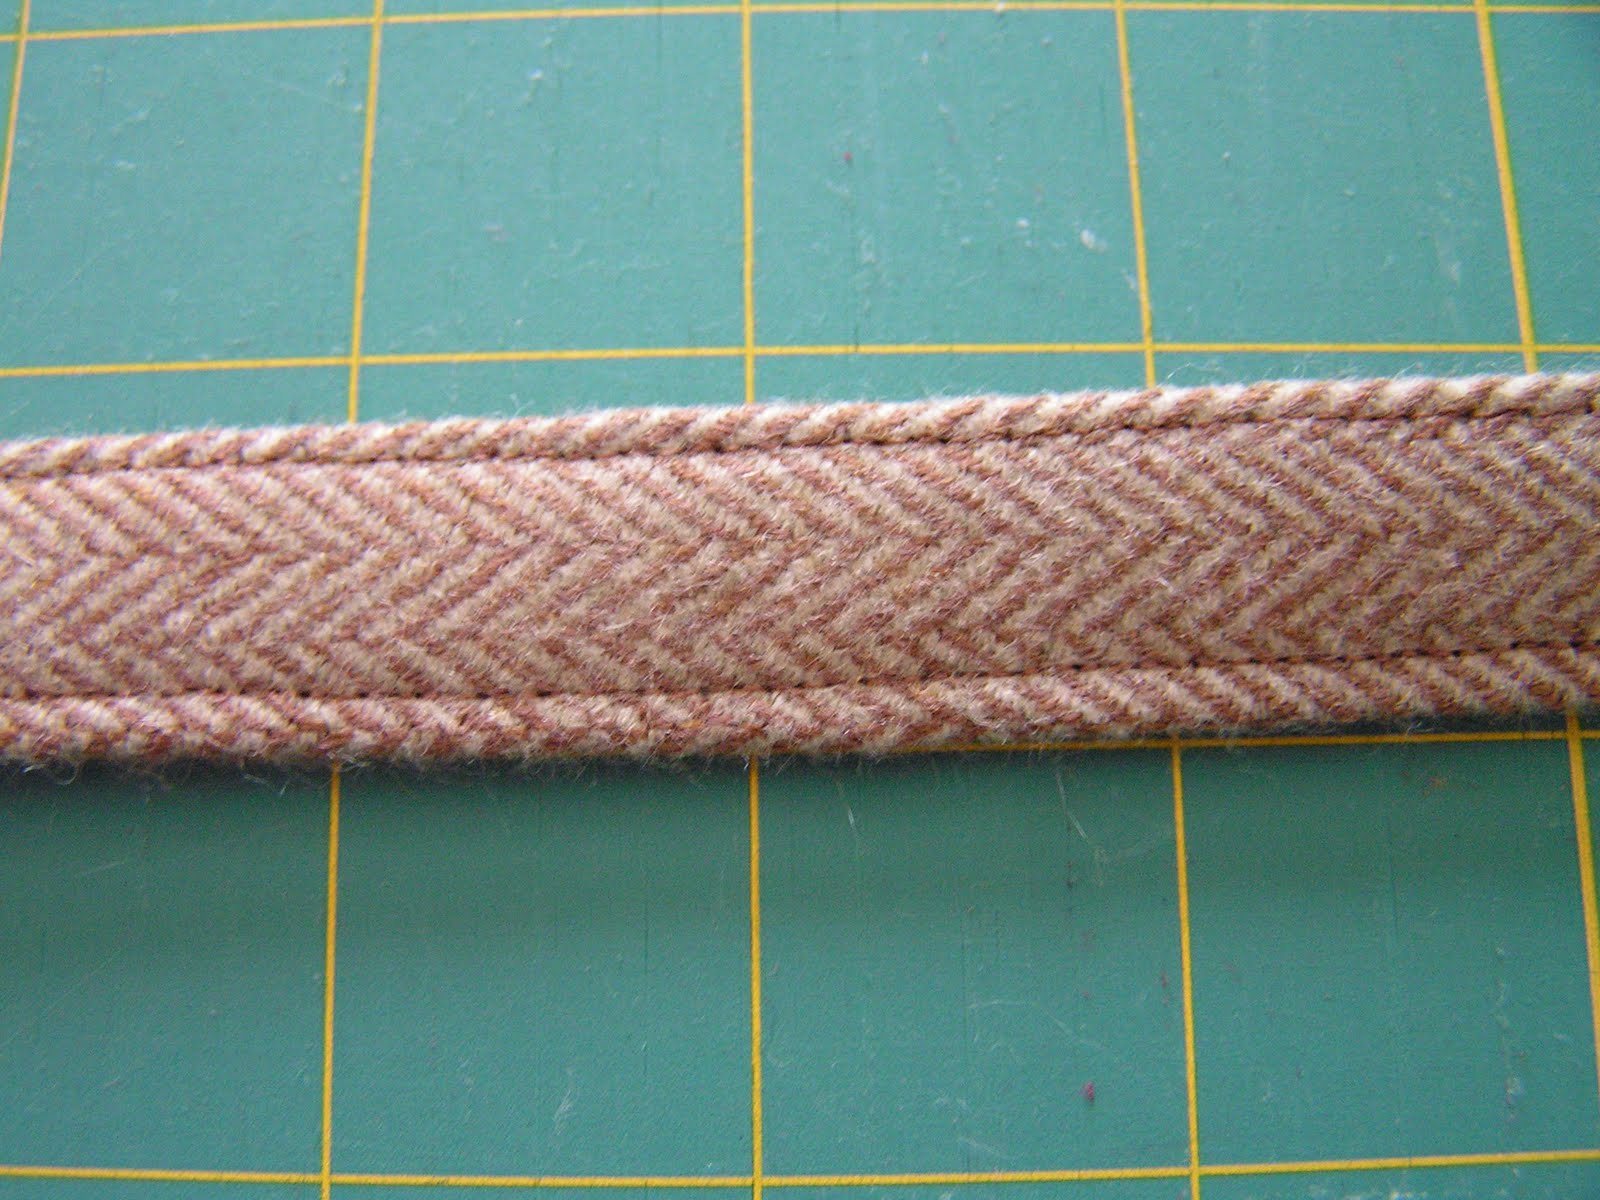
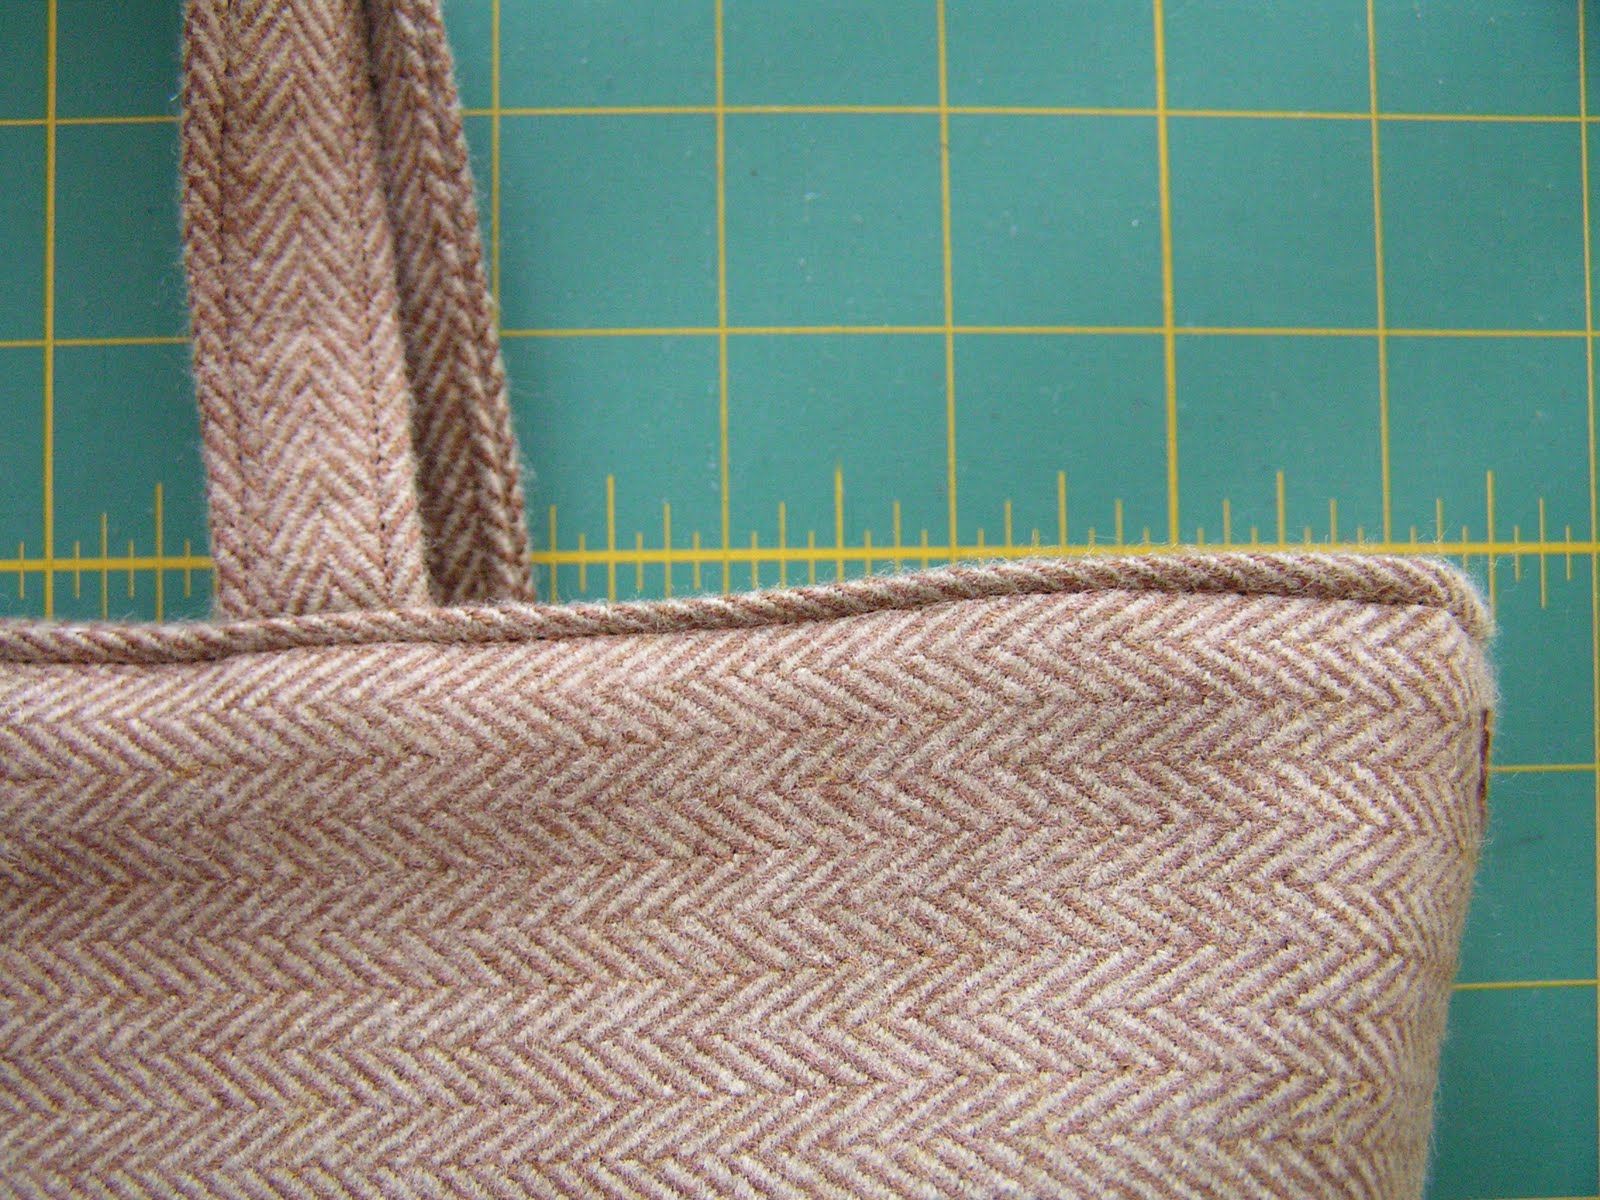
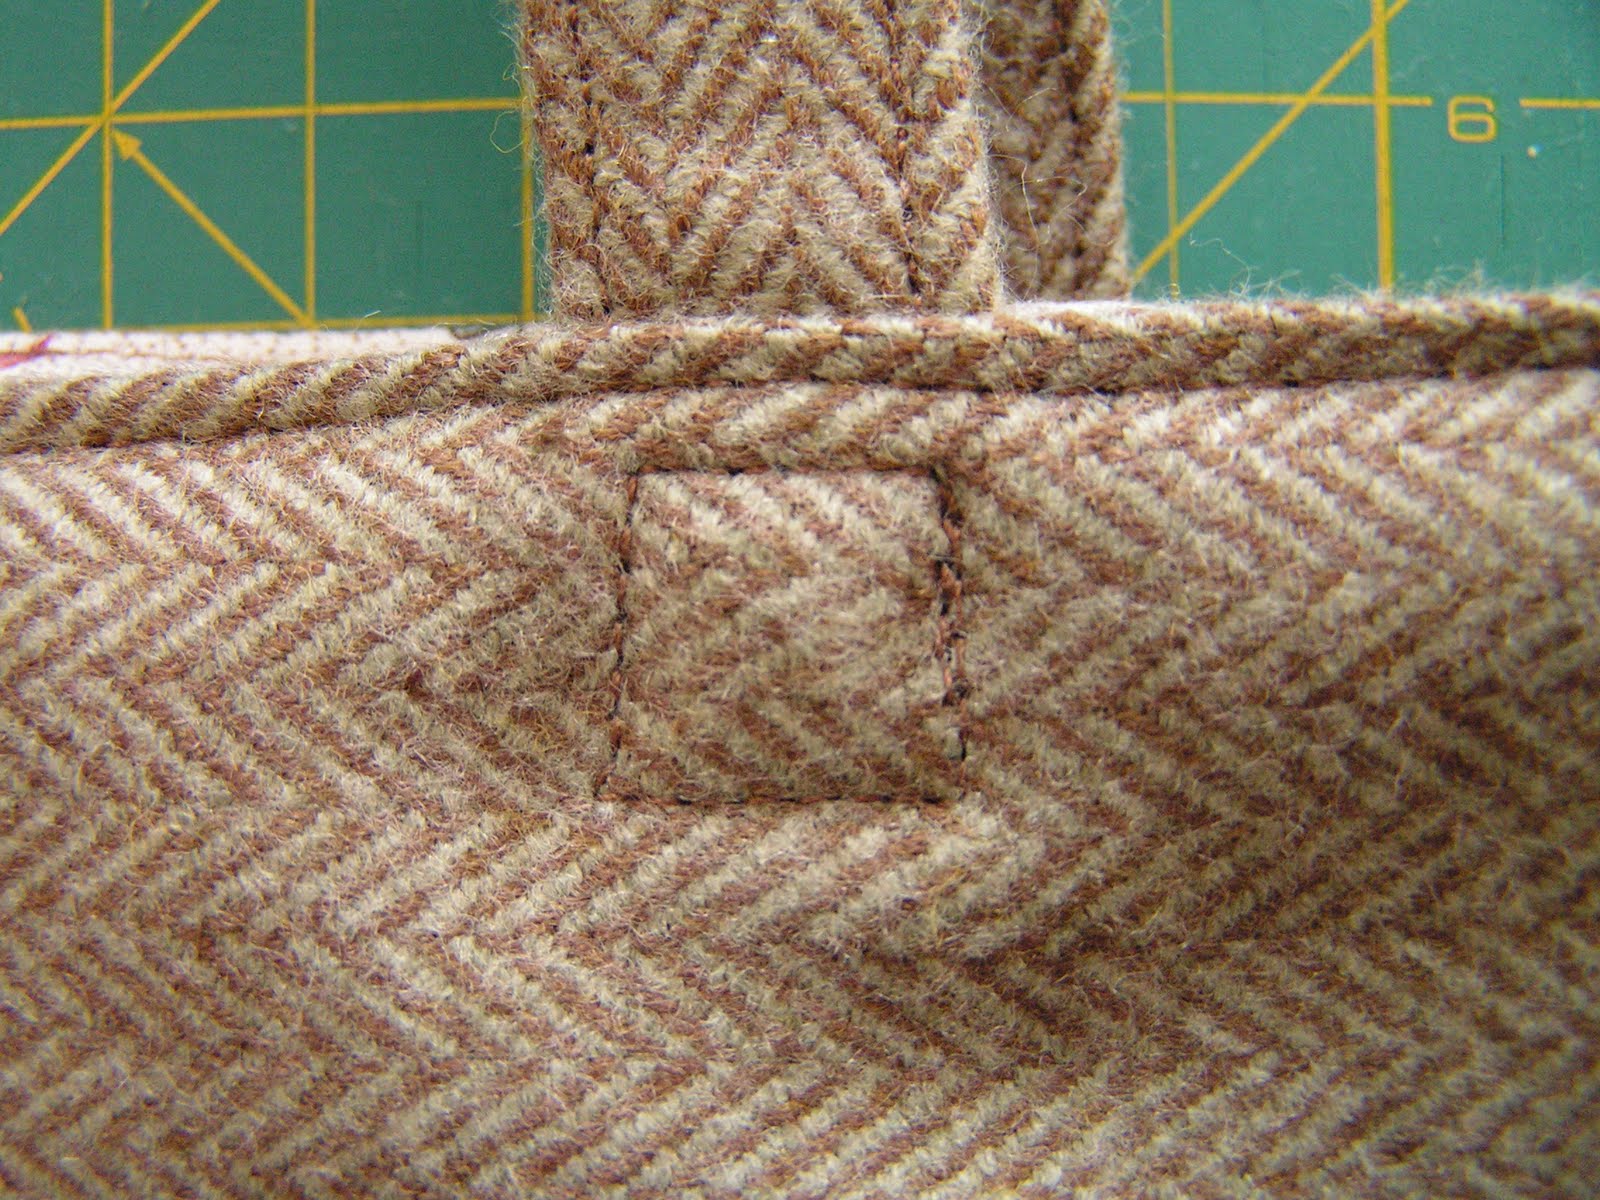
    8. Prendete il tessuto tweed, e ripetere il passaggio n ° 6 e 7. 9. Per fare i manici, ho fuso difficile interfacciamento sui 3 "x 20" strisce. Piegare i due lati verso il centro e piegato a metà. Cucire lungo il bordo con 1/8 "cucitura.


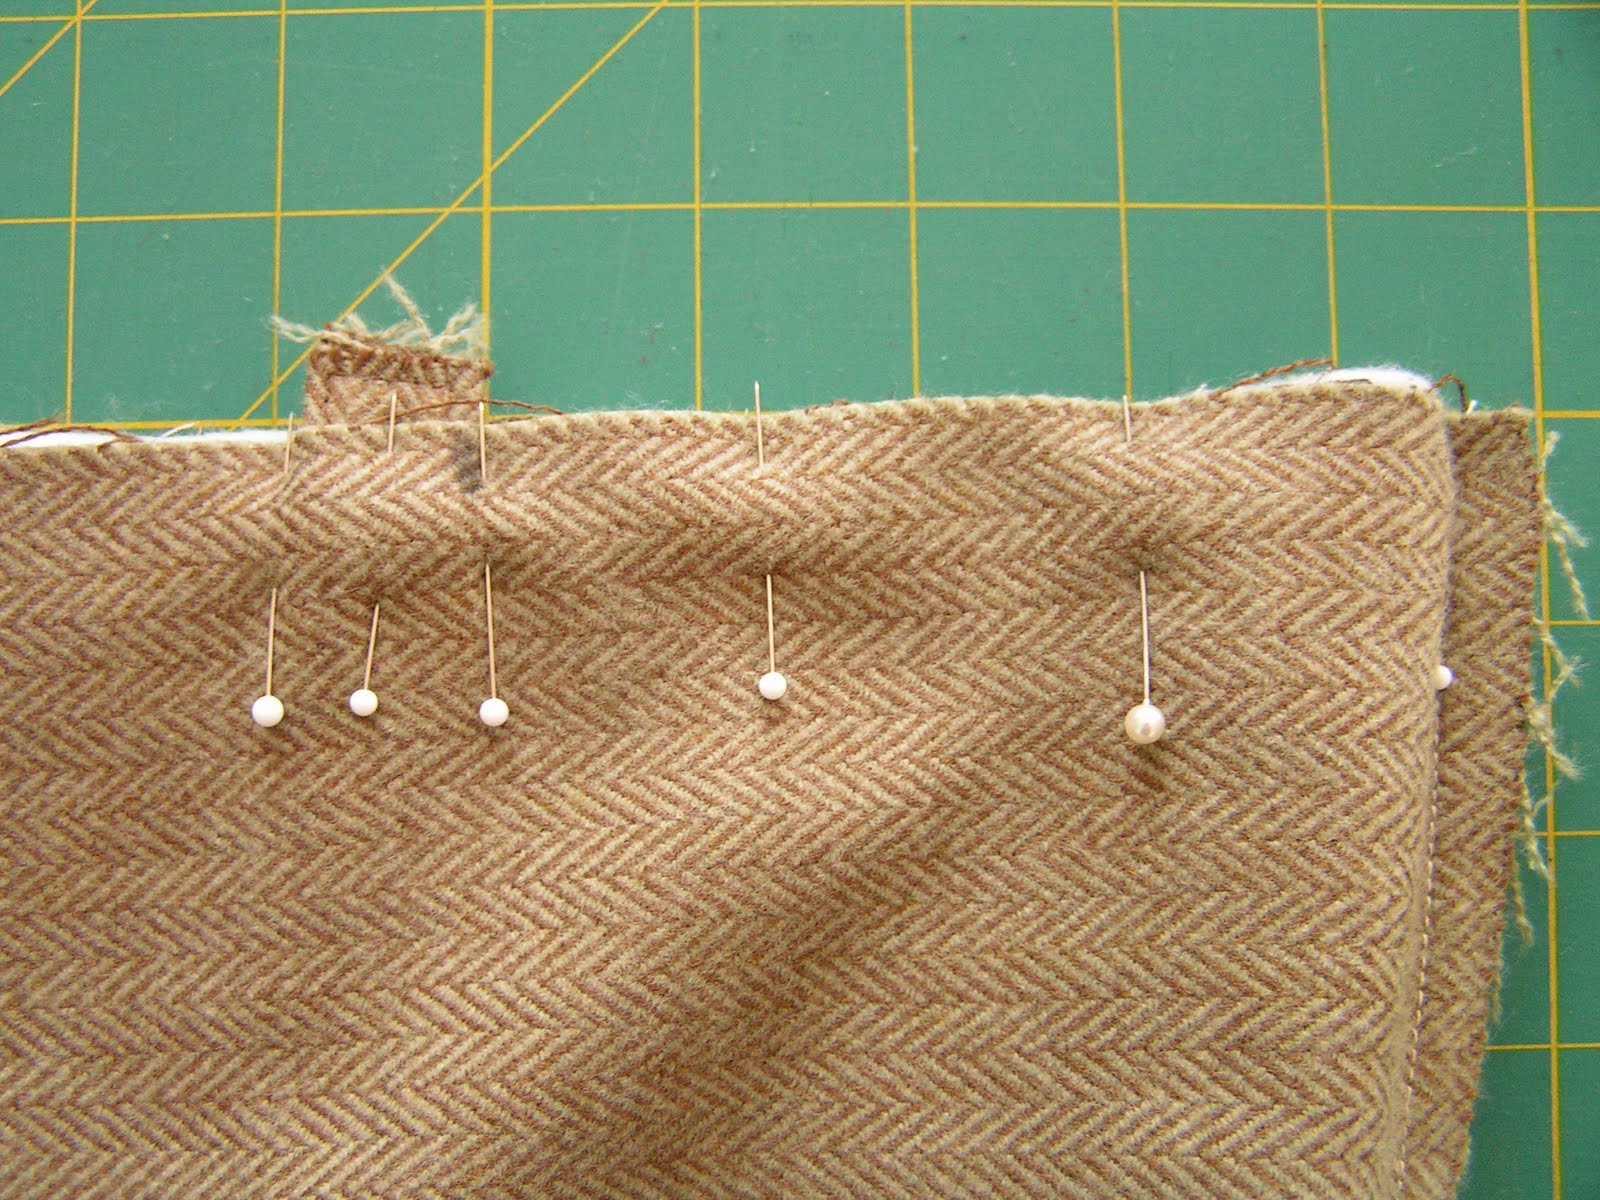
    10. Misura 5 "dai bordi da entrambi i lati della borsa. Inserire il sacchetto maniglia tra il tessuto tweed e la fodera, la linea la maniglia per il" marchio. Pin tutte intorno all'apertura borse. 11. Cucire intorno alla parte superiore.Assicurarsi di lasciare un 5 "a 6" apertura per girare il tessuto dentro e fuori.


    12. Girare il tessuto. Piegare l'apertura bene e il pin. Punto superiore dell'apertura e cucire il fondo delle maniglie per fissarli.


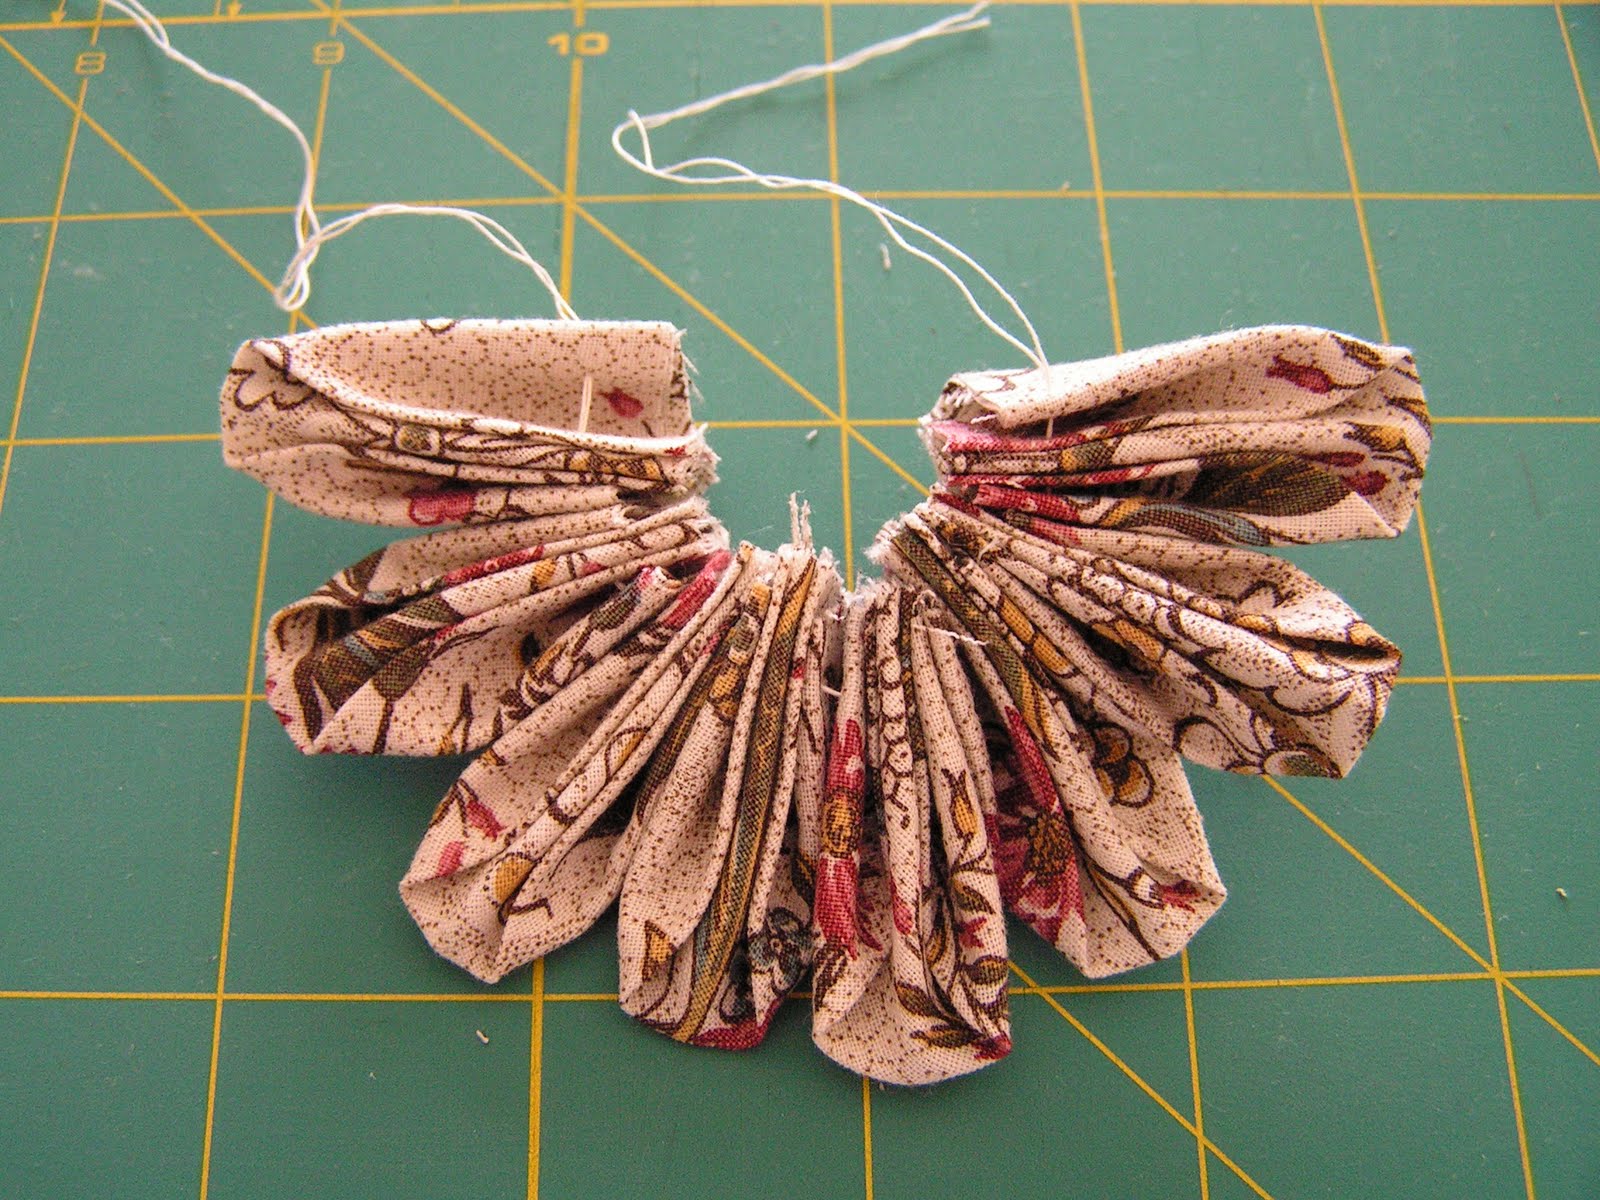
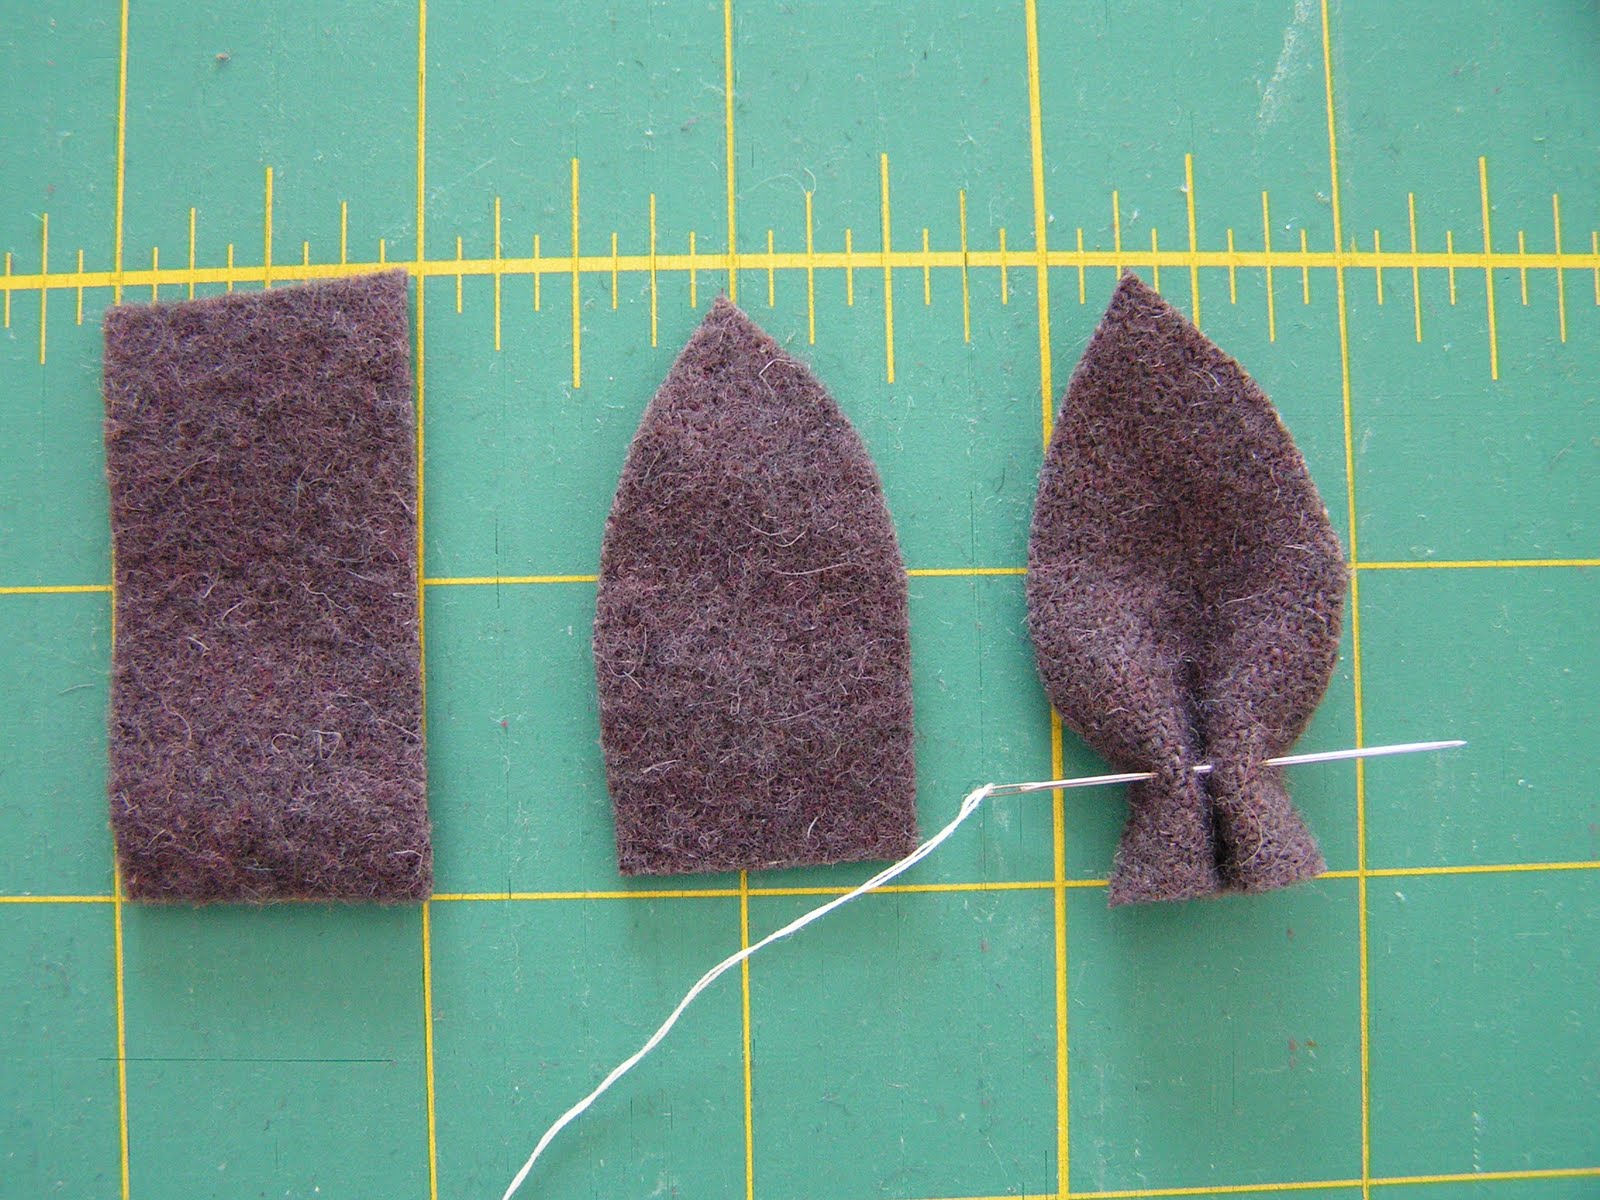
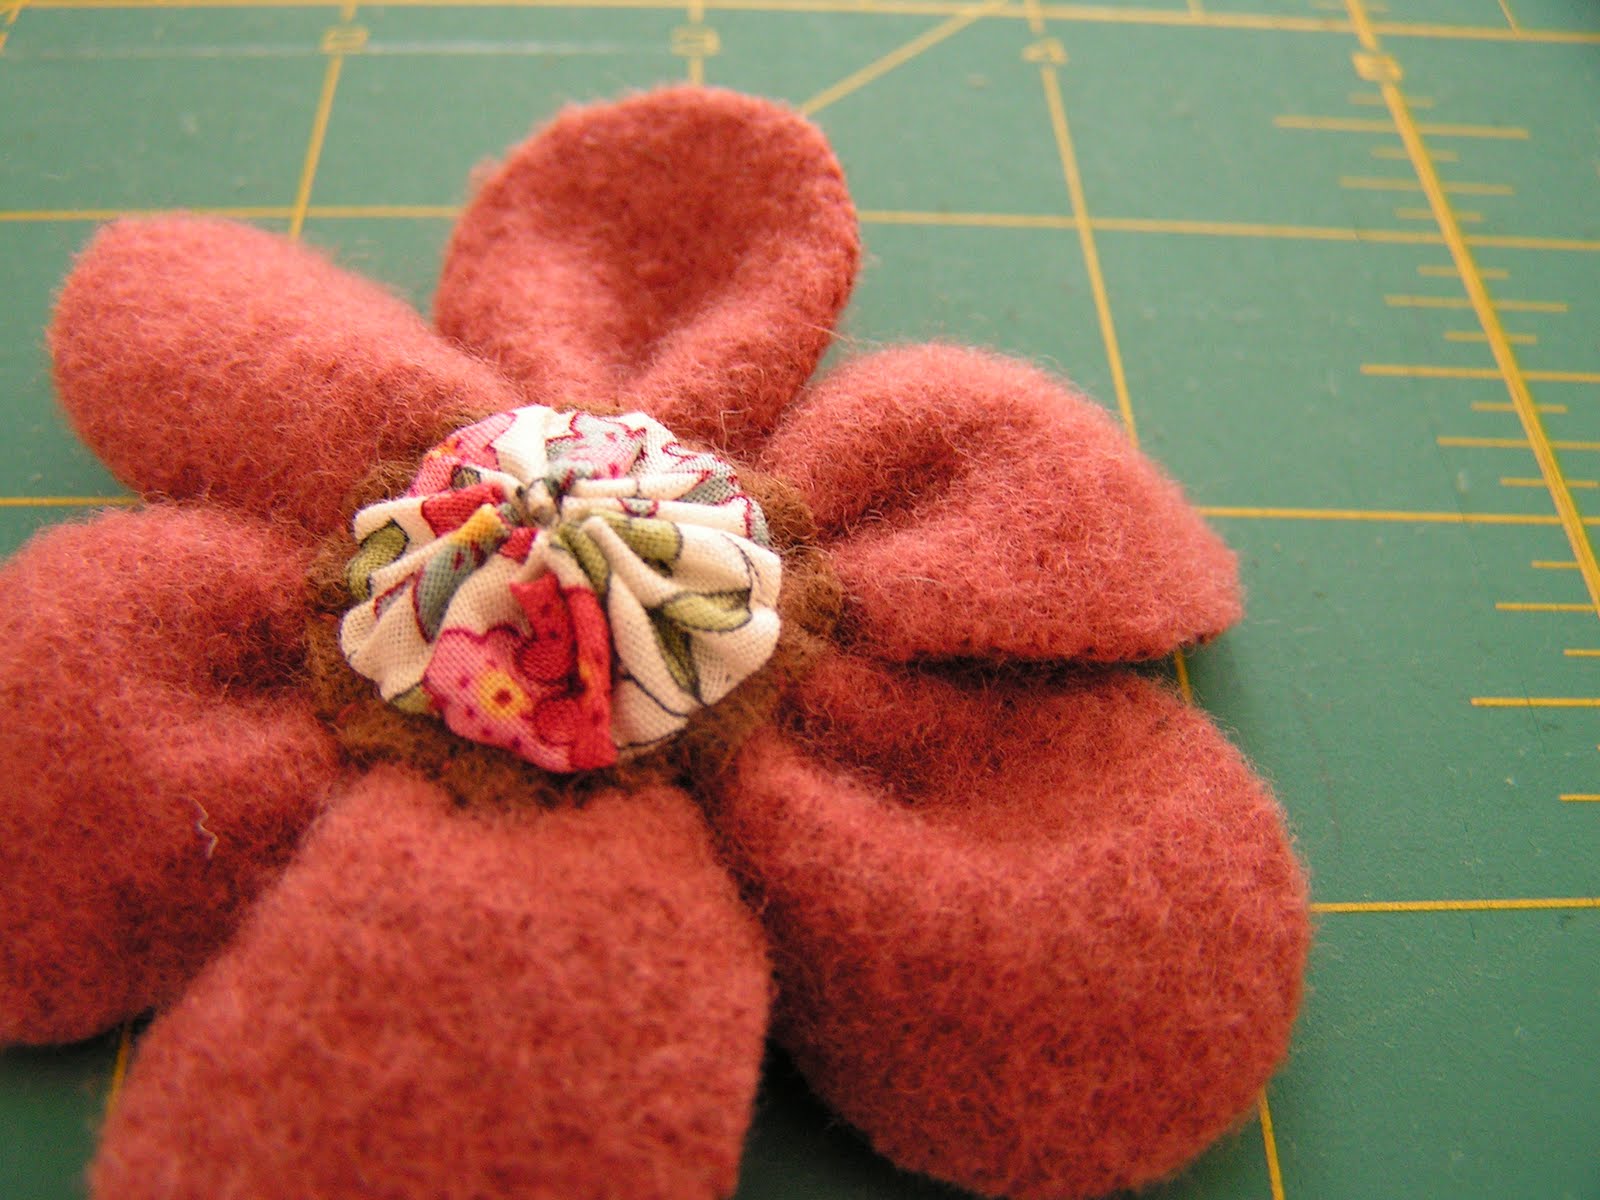
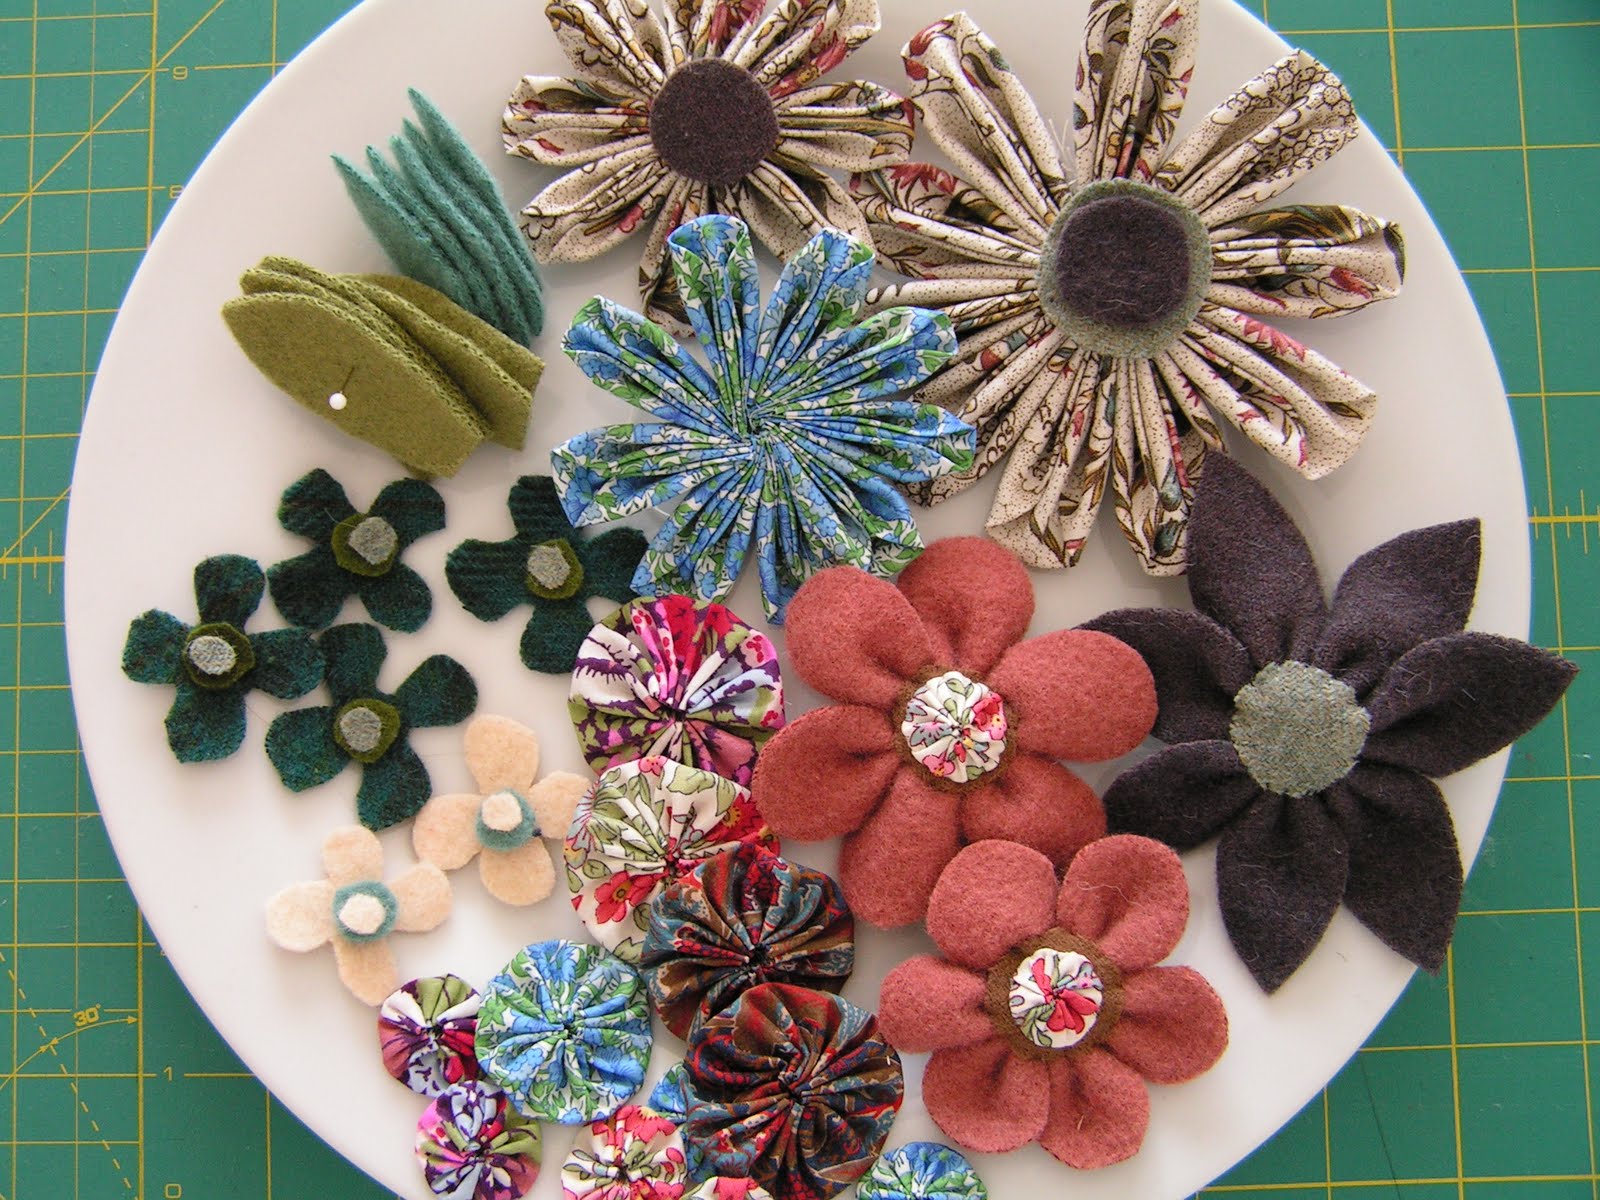
    13. Per rendere l'inserto per la parte inferiore, taglio 2 - 6 "x 14 1/2" dal tessuto di rivestimento, cucire attorno ad esso con un 1/4 x 13 1/2 "rete di plastica e scivolare Stich di" cucitura Insert 5. " chiudere l'apertura Metti nel fondo al sacco.. {Come fare fiori e Yo-Yo** * fiore di stoffa piegata 1 ho tagliato due diverse dimensioni per due fiori diversi. 8 -. 3 ", e 9 - 4". 2. Piegare i tessuti secondo l'immagine. 3. Utilizzando due filoni di fili, fatto passare ogni petalo al thread, non dimenticate di tagliare la parte in eccesso.

    " Sono una culla,dondolata da una mano,nel vuoto di un vortice. Silenzio, silenzio! " (Paul Verlaine) miriam p.

  12. #29
    L'avatar di miriam p
    miriam p è offline Moderatrice
    Data Registrazione
    21-09-2011
    Località
    Sardegna (Sulcis Iglesiente)
    Messaggi
    2,516
    Inserzioni Blog
    1
    Grazie
    1,333
    Ringraziato 1,777 volte in 1,007 Discussioni

    Wink Borsa fiorita.... (seconda parte)


    \
    4. Legare le estremità a formare un cerchio, per fare un fiore. Mi piace cucire ogni petalo tra loro per garantire la loro. * lascia Cut 1 rettangolo "x 2" prima, e tagliare in modo che sembrano foglie. Essi non devono essere perfettamente unificato. fiori * piatte Taglio 1 1/4 "x 1 1/4" quadrato e tagliare in modo che esso avrà quattro petali. Tagliare piccoli cerchi per la metà. * feltro fiore (viola)1. Tagliare 7-1 "x 2". Tagliare in modo che essi hanno a punta in alto. 2. Piegare il fondo a metà e piegare i bordi verso l'esterno. Tirare attraverso il filo per fare un fiore. Li ho messi insieme più volte per garantire meglio. * feltro fiore (rosa disattivato) 1. Tagliare 6 - 1 "x 1 1/4" rettangoli, tagliare in modo che essi avranno una parte superiore arrotondata. 2. Usando lo stesso metodo dal punto 2 su feltro fiore (viola), rendono il fiore. 3. Tagliare un cerchio per la metà e cucire. 4. Sew yo-yo sulla parte superiore del cerchio piccolo feltro * Yo-yo ho usato 3 "e 2" cerchi di fare yo-yo di. Quelli più piccoli sui fiori di feltro sono realizzati con 1 1/4 "cerchi. Se hai bisogno di vedere come fare yo-yo, si può andare alla mia guida . **** Montare A mio parere, questa è la parte più divertente. Solo fissare il sacchetto e fissare i fiori e yo-yo per vedere cosa si può trovare con! 'meglio deiced in cui si desidera che i pezzi più grandi di andare prima, e poi decidere quelle più piccole. Pin per vedere se ti piace il lay out. Se lo fai, è il momento di cucire loro sul sacchetto. ho usato un po 'di filo interdentale DMC fare punti divertenti sui fiori e le foglie. ho fatto un sacco di punti di scorrimento di tutto il yo-yo è. Dopo aver fatto tutto a quanto sopra, è possibile aggiungere pulsanti e tale. tempo di godersi la borsa ... mi piace come è venuto fuori! Mi sento come se potessi portare sempre con sé un po 'di primavera e l'estate anche sotto il cielo cupo di autunno e inverno.


    " Sono una culla,dondolata da una mano,nel vuoto di un vortice. Silenzio, silenzio! " (Paul Verlaine) miriam p.

  13. I seguenti 2 utenti ringraziano miriam p per questa discussione:

    ale3970 (18-04-2014), guia59 (22-11-2012)

  14. #30
    L'avatar di beffy
    beffy è offline Crocettina Gold
    Data Registrazione
    18-10-2011
    Località
    Sardegna ca
    Messaggi
    3,024
    Inserzioni Blog
    1
    Grazie
    522
    Ringraziato 1,177 volte in 746 Discussioni

    Predefinito Borsa con Rose

    Borse-borsa-cucito-rose-celesti-jpg
    Beffy "La vita è preziosa, abbine cura".(Madre Teresa di Calcutta)

  15. I seguenti 3 utenti ringraziano beffy per questa discussione:

    guia59 (22-11-2012), miriam p (22-11-2012), Vero72 (18-09-2013)

Pagina 3 di 9 PrimaPrima 12345 ... UltimaUltima

Discussioni Simili

  1. borse
    Di Annalisa 16 nel forum Richieste Lavori ai Ferri
    Risposte: 3
    Ultimo Messaggio: 28-03-2013, 19:51
  2. borse
    Di patrizia61 nel forum Punto Croce
    Risposte: 2
    Ultimo Messaggio: 27-07-2012, 19:01
  3. Borse feltro
    Di M.Luisa56 nel forum Feltro
    Risposte: 35
    Ultimo Messaggio: 19-12-2011, 10:37
  4. borse a maglia
    Di mene' nel forum Richieste Lavori ai Ferri
    Risposte: 1
    Ultimo Messaggio: 06-11-2011, 13:43
  5. BORSE
    Di bigmammy nel forum Casa: Trucchi e Consigli
    Risposte: 3
    Ultimo Messaggio: 06-06-2008, 11:20

Segnalibri

Segnalibri

Permessi di Scrittura

  • Tu non puoi inviare nuove discussioni
  • Tu non puoi inviare risposte
  • Tu non puoi inviare allegati
  • Tu non puoi modificare i tuoi messaggi
  •